Apps & tracking
How to Log Food With a Photo (and Get Numbers You Can Trust)
To log food with a photo, open a photo calorie counter, take one clear, well-lit picture of the whole plate from about 45 degrees, then check what the app found: the foods, the portion in grams and anything it could not see, such as oil, sauce or your drink. Fix what is off, save, and you are done in under a minute. The photo does the first draft; your 15-second review is what makes the number worth trusting.
How photo logging works, in three steps
A photo calorie counter is doing three separate jobs when you tap the shutter, and it helps to know which one it is doing, because each fails in a different way.
- Identify the foods. The app recognizes what is on the plate: grilled chicken, white rice, broccoli, a wedge of lemon. This is the part modern AI does best, especially for common, distinct foods.
- Estimate the portions. It then guesses how much of each food there is, usually in grams. This is the hardest step, because a photo is flat and has no built-in ruler. A 150 g and a 220 g portion of rice can look surprisingly similar.
- Match to a nutrition database. Finally, each food and portion is looked up in a database to get calories, protein, carbs and fat. A good match to a trusted source matters as much as the recognition itself.
Most of the error in a photo log comes from step two, and a bit from what the camera cannot see at all, like the butter melted into the vegetables. We cover the accuracy question in depth in how photo calorie tracking works and how accurate it is, so this guide sticks to the practical side: how to get a good result, every time, with very little effort.
How to log a meal with a photo, step by step
The exact buttons differ between apps, but the routine is the same everywhere.
- Photograph before you eat. A full plate is far easier to read than a half-eaten one. If you forget, a photo of what is left plus a note ("ate half") still beats nothing.
- Take one clear shot of the whole plate. More on how below. One good photo is better than three rushed ones.
- Read the list of foods. Does it match what is on the plate? Delete anything it invented and add anything it missed.
- Check each portion. Look at the grams, not just the calories. Nudge them up or down if they look wrong.
- Add the invisible extras. Cooking oil, butter, dressing, sauce, sugar in your coffee, the drink next to the plate.
- Save it to the right meal. Breakfast, lunch, dinner or snack, so your day reads correctly later.
Once you have done it a few times, steps three to six take about 15 seconds. That review is the habit worth building. If you are new to tracking in general, our beginner's guide on how to count calories covers the bigger picture.
How to take a food photo the app can read
You do not need to be a food photographer. You do need to give the app a fair chance. These six habits make the biggest difference.
1. Use good light
Daylight from a window is ideal. Dim restaurant light, strong color casts and harsh shadows make foods harder to tell apart, and dark sauces can disappear entirely. If it is dark, turn on a lamp or move the plate rather than relying on the flash, which flattens everything.
2. Shoot from about 45 degrees
Straight overhead is great for flat foods like pizza or a salad, but it hides height, so a pile of rice can look smaller than it is. A 45-degree angle, roughly where your eyes are when you sit at the table, shows both the spread and the depth. For tall foods, such as a burger or a stacked sandwich, angle a little lower.
3. Get the whole plate in the frame
Include the edges of the plate or bowl. The plate size is one of the few clues the app has for scale, and a cropped photo removes it. Do not zoom; step back slightly instead.
4. Keep items separate where you can
If you are plating up yourself, put the rice, the curry and the salad side by side rather than stacked. Separate foods are easier to identify and to size. You do not need to rearrange a restaurant meal, but moving a lettuce leaf off the chicken takes two seconds.
5. Put a fork or spoon in the shot
A regular fork or spoon next to the plate gives the app, and you, a familiar object for scale. It will not turn a photo into a food scale, but it helps both of you judge whether that is half a cup or a cup and a half.
6. Show what is hidden
If there is a pat of butter under the pancakes or a dressing in a little cup, leave it visible. If you used oil to cook, you will add it by hand later. Lift the top of a wrap if you want the filling read correctly.
Tip: keep a "default angle" habit: elbows on the table, phone at eye level, whole plate in the frame. Consistent photos make it easier to spot when a portion looks bigger than usual.
What to check before you save
This is the part that turns a guess into a useful log. Check four things.
The portion in grams
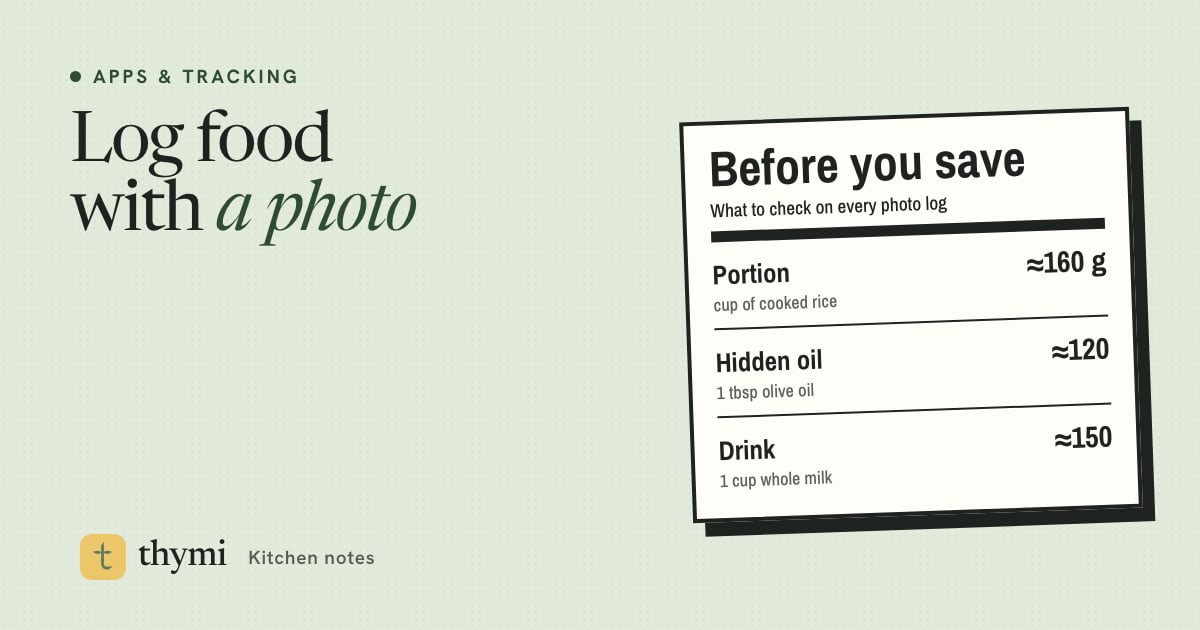
Calories follow the portion, so look at the weight. A few anchors help. A cup of cooked white rice is about 160 g and roughly 200 kcal, according to USDA FoodData Central. A palm-sized piece of cooked chicken breast is roughly 85–120 g. A medium banana is about 120 g. If you have a food scale, weigh your common foods once or twice; after that your eye gets much better. Our guide to estimating portion sizes without a food scale has more hand-and-plate shortcuts.
Hidden oil, butter and sauces
The camera sees food, not how it was cooked. One tablespoon of olive oil is about 120 kcal (USDA), and a tablespoon of butter is about 100 kcal. Two tablespoons of a creamy dressing such as ranch is roughly 130 kcal. Stir-fries, roasted vegetables, curries and restaurant food often carry one to three tablespoons of added fat per serving, so it is worth adding a line for it when you know or suspect it is there.
Drinks
The glass next to the plate is easy to forget. A cup (240 ml) of whole milk is about 150 kcal, a 12 oz can of regular cola is about 140 kcal, and juice is in a similar range. Water, black coffee and unsweetened tea are close to zero. If you had wine or beer, see our guide to calories in alcohol.
Verified vs Estimated
Look at where each number came from. In Thymi, every item is matched to USDA FoodData Central or Open Food Facts and labelled Verified or Estimated, so you can see at a glance which numbers deserve a second look. Estimated items are not wrong, but they are the ones worth checking, especially if you eat them often. If something is off, you can tap the grams up or down, or use Fix it and say what changed in plain words, like "it was 2 eggs, not 3" or "no cheese".
Good to know: you are aiming for consistent, not perfect. Small errors in both directions tend to even out across a week. A habit of checking portions and adding oil will do more for your numbers than any single perfect log. Our list of calorie counting mistakes covers the ones that do add up.
When to use a barcode, label or sentence instead
A photo is the fastest way to log a plate of food. It is not always the most accurate way to log everything. Pick the method that matches the food.
| What you are eating | Best method | Why |
|---|---|---|
| A plate of distinct foods | Photo | Fast, and the foods are easy to identify |
| Packaged food with a barcode | Barcode scan | Uses the product's own nutrition data |
| Packaged food without a usable barcode | Photo of the nutrition label | Reads the exact numbers from the package |
| Something you can't photograph well (a smoothie, soup, a snack you already ate) | Describe it | "Two eggs on sourdough with butter" is clearer than a blurry photo |
| A meal you eat every week | Saved meal | One tap, the same numbers every time |
Barcodes and labels win for packaged foods because the numbers come straight from the manufacturer. A photo of a protein bar can tell what it is, but the label tells you exactly what is in it. Our guide on using a barcode scanner to count calories goes deeper, and how to read a Nutrition Facts label explains serving sizes, which trip up a lot of people.
Describing works well for drinks, blended foods and anything you know the recipe for. If you made the smoothie, typing "banana, 1 cup whole milk, 1 tbsp peanut butter" will beat any photo of a glass of beige liquid.
Mixed dishes, bowls and home cooking
Curries, stews, casseroles, pasta bakes and grain bowls are where photo logging needs the most help, because the ingredients are mixed and the fat is cooked in.
- Name the dish. If the app reads "brown stew", add "chicken tikka masala" or "beef chili" so it matches the right recipe.
- Add a short description. A photo plus "made with coconut milk" or "about 2 tbsp oil for the whole pan" gives the app information it cannot see.
- Check the portion as a whole. For a bowl, compare it with a measuring cup once. Many cereal and pasta bowls hold 2 cups or more.
- Save your regulars. If you cook the same chili most weeks, log the whole pot once, divide by servings and save it as a meal. After that, one tap.
- At restaurants, lean a little high. Restaurant portions and fat tend to be generous. Our guide on tracking calories when eating out has more on this.
Regional dishes are worth a special mention. If you eat a lot of Indian, Mexican or West African food, for example, check that the app's match is the dish you actually ate, not a Westernized version. For homemade curries, stews and bakes, our guide on tracking calories in home-cooked meals shows how to log a whole pot once.
A one-week plan to make photo logging a habit
Photo logging is only useful if you keep doing it. Here is a gentle way to build it in, one small step a day.
- Day 1: one meal. Photograph just one meal, whichever is easiest. Read the result and fix anything that looks off. That is the whole job.
- Day 2: two meals. Add a second meal. Try the 45-degree angle and the fork for scale.
- Day 3: the extras. Log your meals and add oil, sauces and drinks by hand. Notice how much they add.
- Day 4: mix methods. Scan one barcode and describe one snack in a sentence. Learn which method suits which food.
- Day 5: a mixed dish. Log a curry, stew or bowl with a photo plus a short description of how it was made.
- Day 6: save a regular. Turn a breakfast or lunch you eat often into a saved meal.
- Day 7: look back. Scroll through the week. Which logs needed the most fixing? That tells you where to take more care, or where to switch methods.
Missed a meal or a day? Log the next one. A food diary with a few gaps is still far more useful than none, and the photos themselves make it easy to remember what you ate. For why keeping a log works at all, see how to keep a food diary.
Tip: in Thymi, a Home Screen widget shows calories left for the day, so you can check where you are without opening the app. Streaks and stamps mark the days you log, with no red numbers when you go over.
Frequently asked questions
How do I log food with a photo?
Open a photo calorie counter, take one clear, well-lit photo of the whole plate from about 45 degrees, then review the result. Check that the foods are right, adjust the portion in grams, add anything the camera could not see such as oil, sauce or drinks, and save it to the right meal.
How accurate are photo calorie counters?
They are usually good at identifying common foods and less reliable at judging portion size and hidden fats. Accuracy improves a lot when you take a clear photo, check the grams and add oils and sauces yourself. For packaged foods, a barcode or label scan is more accurate than a photo.
What is the best angle for a food photo?
About 45 degrees, roughly your eye level when sitting at the table, works best for most meals because it shows both the spread of the food and its height. Straight overhead is fine for flat foods such as pizza or salad. Keep the whole plate in the frame.
Can a photo calorie counter see oil and butter?
Not reliably. Oil, butter and sauces cooked into food are mostly invisible in a photo. Add them by hand when you know or suspect they are there. One tablespoon of olive oil is about 120 kcal, so it is worth including.
Should I use a photo or a barcode scan?
Use a barcode scan or a photo of the nutrition label for packaged foods, because the numbers come from the manufacturer. Use a photo for plates of fresh or cooked food, and describe the meal in a sentence for drinks, soups, smoothies or anything that is hard to photograph.
This article is general information for healthy adults, not medical or nutritional advice. Talk to a doctor or registered dietitian before changing how you eat, especially if you are pregnant or breastfeeding, have or have had an eating disorder, have a medical condition, or take medication.